
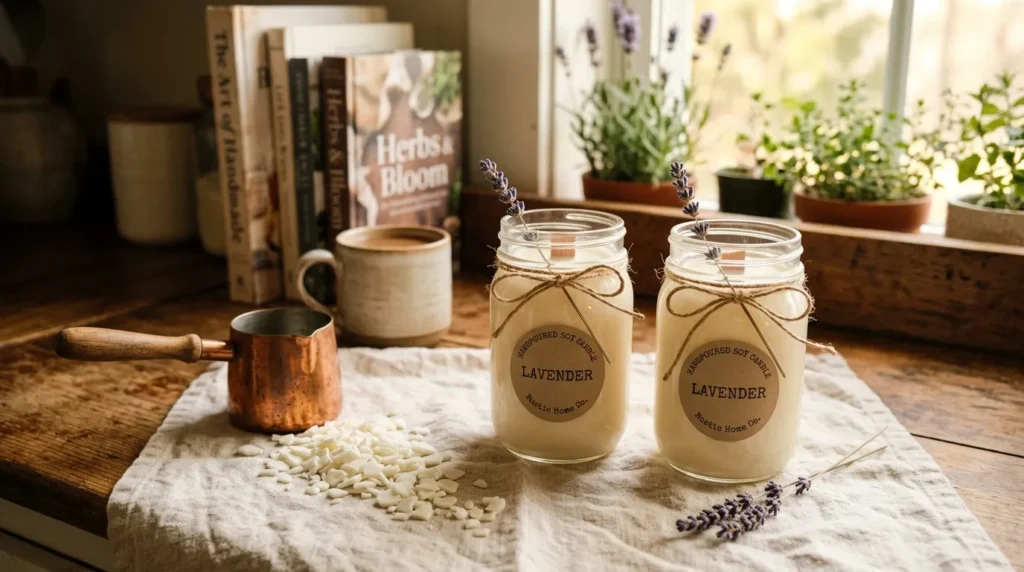
Why Homemade Candles Make the Most Meaningful Gifts
There is something quietly powerful about a candle. It does not just light a room — it sets a mood, recalls a memory, and makes a space feel like home. Now imagine handing someone a candle you made with your own hands, poured into a jar you chose, scented with something that made you think of them. That is the kind of gift that stays with a person long after the wax is gone.
Homemade candles for gifts have become one of the most beloved handmade gestures of 2026, and for good reason. In a world that feels increasingly mass-produced, a handcrafted candle carries weight. It says: I slowed down. I made something just for you.
The wonderful news is that making your own soy candles does not require a specialty studio or a long list of expensive equipment. With a few basic supplies, an afternoon in your kitchen, and a little creative spirit, you can pour beautiful, long-burning candles that are genuinely impressive — and genuinely personal. This guide will walk you through every step, from gathering supplies to packaging your finished candles like a pro.
If you love the idea of crafting with intention and calm, you might also enjoy our guide to Emotional Support Crafts: Crafting for Calm and Self-Care — candle making fits beautifully into that slower, more mindful approach to making.
Why Soy Wax Is the Best Choice for Beginners
Not all candle wax is created equal, and the type you choose makes a real difference in how your candle burns, smells, and feels as a gift. For beginners, soy wax is the clear first choice — and here is why.
It burns cleaner and longer
Soy wax is a plant-based, renewable material derived from soybeans. Unlike paraffin wax — which is a petroleum byproduct known to emit chemicals when burned — soy burns cleanly and slowly. A soy candle typically burns 30 to 50 percent longer than a paraffin candle of the same size, making it a genuinely useful and lasting gift.
It holds fragrance beautifully
One of the best qualities of soy wax is its ability to carry scent. It produces what candle makers call a strong “cold throw” — meaning the fragrance is noticeable even when the candle is not lit. This makes your finished candles smell wonderful straight out of the box, which matters enormously when you are giving them as gifts.
It is forgiving and easy to work with
Soy wax melts at a relatively low temperature, cleans up easily with soap and warm water, and is widely available at craft stores and online. Mistakes are easy to fix — if a candle top cracks or looks uneven, a gentle pass with a heat gun or hair dryer smooths it right out. For a beginner, that kind of forgiveness is priceless.
For more beginner-friendly craft projects that use simple, accessible materials, browse our Gateway Crafts: Beginner-Friendly Projects to Spark Your Creative Journey — it is a wonderful companion to this guide.
What You Will Need: Your Candle Making Supply List
Before you begin, gather everything on this list. Having your supplies organized and within reach before you start makes the process smooth and genuinely enjoyable — part of the quiet pleasure of making something by hand.
Essential supplies
- Soy wax flakes — Look for 100% natural soy wax flakes at your local craft store or online. A one-pound bag is enough to make two to three small candles.
- Cotton wicks with metal tabs — Pre-tabbed wicks are the easiest to work with. Choose a wick size that matches your jar diameter.
- Glass jars or tins — Mason jars, vintage teacups, straight-sided glass tumblers, and small apothecary jars all work beautifully. Upcycled jars add extra charm.
- Fragrance oil or essential oils — Fragrance oils are formulated specifically for candles and give a stronger, longer-lasting scent. Essential oils work too, though the scent is subtler. Start with fragrance oils for your first batch.
- A pouring pitcher or heat-safe glass measuring cup — This is what you will melt your wax in and pour from.
- A medium saucepan — For creating your double boiler setup.
- A thermometer — A simple candy or kitchen thermometer works fine.
- Clothespins or pencils — For centering and securing your wicks while the wax sets.
- A kitchen scale — Measuring wax by weight gives consistent results.
- Parchment paper or newspaper — To protect your workspace.
Optional but wonderful extras
- Candle dye blocks or liquid dye for color
- Dried botanicals — lavender buds, rosemary sprigs, or rose petals — for pressed onto the outside of the jar or gently resting on the top of cooled wax
- Natural twine, ribbon, or kraft paper tags for packaging
For a one-stop resource on candle making supplies, CandleScience’s beginner soy candle guide is one of the most trusted references in the candle making community, with detailed supply lists and beginner kits.
Step-by-Step: How to Make Homemade Soy Candles
Now for the satisfying part. Follow these steps at a relaxed pace — there is no rush. Candle making is meant to be enjoyed.
Step 1 — Prepare your workspace and jars
Lay parchment paper or newspaper across your counter to protect the surface. Wipe the inside of each candle jar with a small amount of isopropyl alcohol on a paper towel. This removes any dust or residue and helps the wax adhere cleanly. Then, using a dab of hot glue or a wick sticker, secure the metal base of each wick to the center bottom of every jar. Loop the top of the wick around a clothespin or pencil and rest it across the rim of the jar to keep it upright and centered.
Step 2 — Melt your soy wax
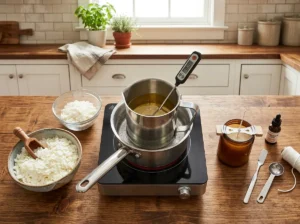
Fill your medium saucepan with about two inches of water and bring it to a gentle simmer over medium heat. Place your pouring pitcher or heat-safe measuring cup inside the pot — this is your double boiler, and it keeps the wax from coming into direct contact with heat, which prevents scorching. Add your soy wax flakes and stir occasionally until fully melted. Soy wax typically melts around 170 to 180 degrees Fahrenheit — your thermometer will confirm this. Once melted, remove the pitcher from the heat.
Step 3 — Add fragrance
Allow the melted wax to cool slightly to around 140 to 150 degrees Fahrenheit before adding your fragrance oil. This temperature range locks in the scent most effectively. A general rule of thumb is one ounce of fragrance oil per pound of wax, though you can adjust this based on how strong you want the scent to be. Stir slowly and gently for about two minutes to fully incorporate the fragrance.
Step 4 — Pour into your jars
Carefully pour the scented wax into your prepared jars, leaving about half an inch of space at the top. Work slowly and keep your wick centered as you pour. Set the jars on a flat, undisturbed surface and allow them to cool at room temperature. Avoid moving them while the wax is setting — drafts and temperature fluctuations can cause cracking or an uneven surface.
Step 5 — Top off and finish
As soy wax cools, it naturally contracts and can leave a small sinkhole around the wick. This is completely normal. Once your candles have set for about two hours, melt a small amount of leftover wax and do a second pour to top them off and create a smooth, even surface. Allow to cool completely — at least four to six hours, or overnight.
Step 6 — Trim the wick and cure
Trim each wick to about one-quarter inch above the wax surface. Then comes the hardest part — patience. Soy candles should cure for at least one week before burning to develop their best fragrance throw. Two to three weeks is even better. Store them in a cool, dry spot out of direct sunlight while they cure.
Choosing Scents That Feel Like Gifts
Fragrance is the soul of a handmade candle. The right scent can transport someone to a favorite place, a treasured season, or a warm memory. When choosing scents for gifting, think about the person first and the trend second.
Scent combinations by mood and season
Cozy and warm
Vanilla and sandalwood. Cinnamon and clove. Cedar and amber. These are the scents of fireside evenings and wool blankets — perfect for autumn and winter gifting, and deeply comforting to almost everyone.
Fresh and clean
Eucalyptus and mint. Lemon and thyme. Cotton and sea salt. These lighter blends feel spa-like and reviving — a beautiful gift for someone who loves a serene, airy home.
Floral and botanical
Lavender and vanilla. Rose and cedarwood. Jasmine and citrus. These soft, layered blends feel romantic and thoughtful — ideal for Mother’s Day, birthdays, or bridal celebrations.
A note on scent labeling
When gifting, always label your candles with the fragrance name. A small kraft paper tag tied with twine is both functional and beautiful. You can handwrite the scent name, the burn time, and a short personal note. That simple tag transforms a candle into a letter.
For inspiration on how to style and present your handmade items at home, our post on Styling Your Shelves with Purpose: The Art of Layered Decor is full of ideas for displaying and gifting handcrafted pieces beautifully.
Packaging Your Handmade Candles for Gifting
A homemade candle deserves packaging that reflects the love that went into making it. The good news is that the most meaningful packaging is often the simplest.
Simple packaging ideas
- Kraft paper and twine — Wrap the jar in a square of kraft paper, gather it at the top, and tie it with natural twine. Tuck in a sprig of dried rosemary or lavender for a finishing touch.
- Muslin bags — Slide a small candle tin or jar into a drawstring muslin bag for a soft, farmhouse feel.
- Wooden crates or boxes — A small wooden crate from the craft store becomes a stunning gift box for multiple candles bundled together.
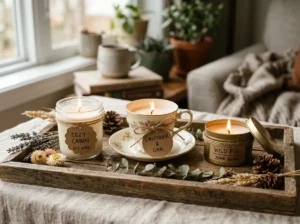
- Vintage tins or teacups — When you pour your candles directly into a thrifted teacup or vintage tin, the container itself becomes part of the gift. No additional packaging needed.
Adding a handwritten note
Never underestimate the power of a handwritten card. A few sentences about why you chose that particular scent for that particular person — or a memory tied to it — elevates a handmade candle from a lovely gift into something genuinely treasured. This is what Katie means when she talks about storytelling through making: the story does not end when the craft is finished. It continues in how you share it.
For more ideas on gathering with heart and creating meaningful moments around the table and at home, explore the Katie Brown Home Workshop Blog — there is always something new to inspire your next handmade creation.
Tips for Making Candle Making a Ritual You Return To
The first batch of candles you pour will be a small adventure — a mix of wonder, patience, and the deeply satisfying smell of warm wax and fragrance filling your kitchen. But the second batch, and the third, become something else entirely. They become a ritual.
Many candle makers find that the act of measuring, melting, and pouring becomes meditative over time. Like baking bread — which we explored in our guide to Homemade Bread for Beginners (That Actually Works!) — candle making rewards slowness. It asks you to be present. And in that presence, something meaningful is made.
Here are a few tips to help you make candle making a sustainable, joyful practice:
- Make candles in batches — Once your supplies are out and your double boiler is going, it takes almost the same effort to pour six candles as it does to pour two. Make a batch and build your gift stockpile throughout the year.
- Keep a fragrance journal — Note which scent combinations you loved, which ones surprised you, and which ones you want to revisit. This becomes your personal candle library over time.
- Involve others — Candle making is a beautiful activity to share. Invite a friend over for an afternoon of pouring and conversation. Everyone goes home with a candle and a memory.
- Reuse and upcycle your jars — Once a candle has burned down, place the jar in the freezer for a couple of hours, then gently remove any remaining wax. Wash with hot soapy water and you have a clean container ready for your next pour.
For further reading on scent selection, fragrance load calculations, and intermediate candle making techniques, the CandleScience Learning Center is an excellent, well-maintained resource used by hobbyists and professional candle makers alike.
The Gift of Making
There is an old idea at the heart of everything we do at the Katie Brown Home Workshop — that the things we make with our hands carry a warmth that no store-bought object ever quite can. A homemade candle is not just wax and fragrance. It is an afternoon of your time. It is a scent chosen with someone specific in mind. It is the quiet care of pouring something slowly, watching it set, trimming the wick just right.
That is what people feel when they receive a handmade gift. Not just the object — but the intention behind it.
So gather your supplies, clear your kitchen counter, and pour your first batch. Give some away. Keep one for yourself. Light it on a quiet evening and remember that the best things in life — and the most meaningful gifts — are often the ones made with your own hands.